Android beginner friends to develop your " First Android App” you need to follow below steps
Step 1: Open Eclipse IDE.

Step 2: Go to Menu Bar select File -> New -> (Click on)Project a new popup window will come

Step 3: Select Android Application Project and click on "Next" button then New Android App popup will come as below screen. Now fill up "Application Name" "Project Name" and "Package Name" for that use Java naming convention means first letter of each word start with capital letter like "MyFirstApp" .

Step 4: Follow below screen then click on Next button then will come new popup window again click on Next button.


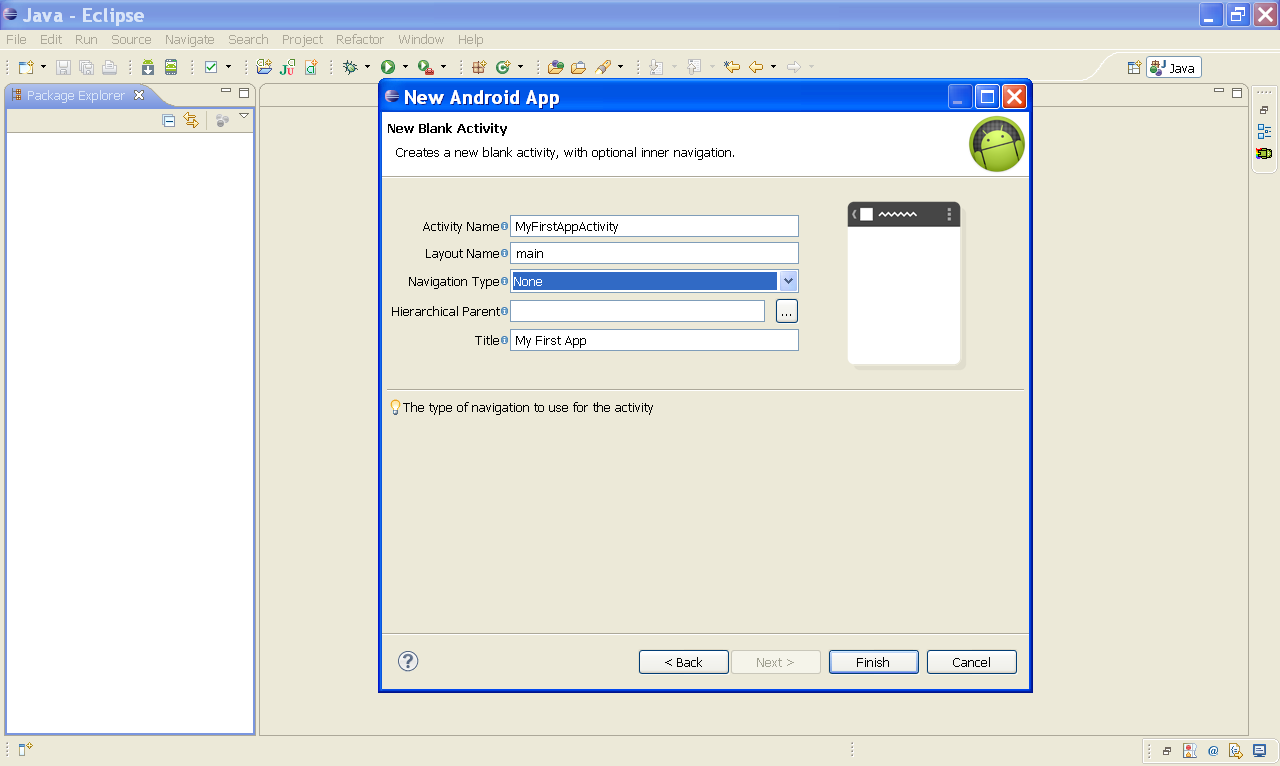
Step 4: Now follow below screen and fill up "Activity Name" "Layout name(layout name shoul be in small letter and keep under score symbol between two words like "my_first_app")" and "Title(can write 2 to 3 words)" now click on "Finish" button.
Step 5: Now you can modify "xml" editor like below using drag and drop widgets features of this framework.

Step 6: After modifying "xml" editor launch your AVD(Android Virtual Device)
Step 7: To run your First Android App right click on your project and click on "Run As-->1 Android Application " or select your project and press " F11" to run your App.
For live watch below video to develop your "First Android App". Need latest Adobe Flash Player to watch this video
main.xml
<LinearLayout xmlns:android="http://schemas.android.com/apk/res/android"
xmlns:tools="http://schemas.android.com/tools"
android:layout_width="match_parent"
android:layout_height="match_parent"
android:orientation="vertical">
<TextView
android:id="@+id/textView1"
android:layout_width="wrap_content"
android:layout_height="wrap_content"
android:textColor="#9966FF"
android:textStyle="bold"
android:textSize="30sp"
android:text="This is my first app." />
<Button
android:id="@+id/button1"
android:layout_width="wrap_content"
android:layout_height="wrap_content"
android:text="Button" />
<CheckBox
android:id="@+id/checkBox1"
android:layout_width="wrap_content"
android:layout_height="wrap_content"
android:text="CheckBox" />
<RadioButton
android:id="@+id/radioButton1"
android:layout_width="wrap_content"
android:layout_height="wrap_content"
android:text="RadioButton" />
</LinearLayout>

MyFirstAppActivity.java
package com.example.myfirstapp;
import android.os.Bundle;
import android.app.Activity;
public class MyFirstAppActivity extends Activity {
@Override
public void onCreate(Bundle savedInstanceState) {
super.onCreate(savedInstanceState);
setContentView(R.layout.main);
}
}

AndroidManifest.xml
<manifest xmlns:android="http://schemas.android.com/apk/res/android"
package="com.example.myfirstapp"
android:versionCode="1"
android:versionName="1.0" >
<uses-sdk
android:minSdkVersion="8"
android:targetSdkVersion="15" />
<application
android:icon="@drawable/ic_launcher"
android:label="@string/app_name"
android:theme="@style/AppTheme" >
<activity
android:name=".MyFirstAppActivity"
android:label="@string/title_activity_my_first_app" >
<intent-filter>
<action android:name="android.intent.action.MAIN" />
<category android:name="android.intent.category.LAUNCHER" />
</intent-filter>
</activity>
</application>
</manifest>

strings.xml
resources>
<string name="app_name">MyFirstApp</string>
<string name="hello_world">Hello world!</string>
<string name="menu_settings">Settings</string>
<string name="title_activity_my_first_app">My First App</string>
</resources>


No comments:
Post a Comment